How to Prepare for a Godot Game Jam: Setup, Addons, and Time-Saving Tricks
From project templates and must-have addons to GDScript patterns and the itch.io export workflow, here's how to set up Godot 4 for your next game jam.
Godot Wild Jam #91 starts on March 13. That gives you three days to prepare. Whether this is your first Godot jam or your tenth, the difference between a smooth weekend and a panic spiral comes down to preparation.
This guide is Godot-specific. We already have a general game jam survival guide and a free tools and assets kit. This one focuses on the engine itself: project setup, addons that save hours, GDScript patterns you will reuse, and the full export-to-itch.io workflow.
Everything here targets Godot 4.6, the latest stable release.
Step 1: Use a Game Jam Template
Do not start from a blank project. A template gives you a main menu, pause menu, settings screen, and scene transitions out of the box. That is two to four hours of jam time you just saved.
Recommended templates:
- Maaack’s Godot Game Template: The most complete option. Includes main menu, options menus with audio/video/keybind tabs, pause menu, credits, a scene loader with loading screen, and an example game scene. Works with Godot 4.6.
- bitbrain’s godot-gamejam: Lighter weight. Gives you basic menu navigation and a pause menu. Good if you want less scaffolding.
- Godot Asset Library: Game Jam Template: Install directly from the editor. Includes a dialogue system, settings, saving/loading, 2D player controllers (sidescroller, top-down, click-to-move), title screen, credits, and interactable objects.
How to use a template: Clone it before the jam starts. Open it in Godot. Delete the example scenes you do not need. Make sure it runs. Now when the theme drops, you are building gameplay immediately instead of wiring up UI.
Step 2: Install These Addons Before the Jam
The Godot Asset Library has hundreds of addons, but during a jam you want proven tools that work and are recently updated. Here are the ones worth installing ahead of time.
For any jam game
- LimboAI: Behavior trees and state machines in one package. If your game has enemies with even basic AI, this saves you from writing a state machine from scratch.
- Phantom Camera: Smooth camera with follow, zoom, and shake. Works in 2D and 3D. Camera feel is one of the fastest ways to make a jam game feel polished.
- Dialogic 2: Visual dialogue editor. If your game needs any text interaction at all, building a dialogue system from scratch during a jam is a trap. Use this instead.
For audio
- GodotSfxr: Generate retro sound effects directly in the editor. Click a button, get a jump sound. Click another, get a laser. Perfect for placeholder audio that often ends up in the final build.
For juice
- Godot Juice Plugin: Screen shake, hit freeze, flash effects, and knockback in a few lines of code. “Game feel” is what separates forgettable jam games from the ones that get rated highly.
Important: Test every addon in your template project before the jam. Addon conflicts and version mismatches are the last thing you want to debug at 2 AM.
Step 3: GDScript Patterns You Will Reuse
Every jam game needs these patterns. Write them once, understand them, and copy them in.
Simple state machine (enum-based)
The simplest state machine works fine for a jam. No need for node-based architectures when you have 48 hours.
enum State { IDLE, RUN, JUMP, ATTACK }
var current_state: State = State.IDLE

func _physics_process(delta: float) -> void:
    match current_state:
        State.IDLE:
            _handle_idle(delta)
        State.RUN:
            _handle_run(delta)
        State.JUMP:
            _handle_jump(delta)
        State.ATTACK:
            _handle_attack(delta)

func change_state(new_state: State) -> void:
    current_state = new_state
Scene transition with fade
# Autoload this as "SceneManager"
extends CanvasLayer

@onready var animation_player: AnimationPlayer = $AnimationPlayer
@onready var color_rect: ColorRect = $ColorRect

func change_scene(path: String) -> void:
    animation_player.play("fade_out")
    await animation_player.animation_finished
    get_tree().change_scene_to_file(path)
    animation_player.play("fade_in")
Screen shake
# Attach to your Camera2D
var shake_amount: float = 0.0
var shake_decay: float = 5.0

func _process(delta: float) -> void:
    if shake_amount > 0:
        offset = Vector2(
            randf_range(-shake_amount, shake_amount),
            randf_range(-shake_amount, shake_amount)
        )
        shake_amount = lerp(shake_amount, 0.0, shake_decay * delta)

func shake(amount: float = 10.0) -> void:
    shake_amount = amount
One-shot timer helper
# Call from anywhere: await Util.wait(0.5)
# Autoload as "Util"
extends Node

func wait(seconds: float) -> void:
    await get_tree().create_timer(seconds).timeout
These four patterns cover movement states, scene flow, juice, and timing. Together they handle 80% of what a typical jam game needs at the code level.
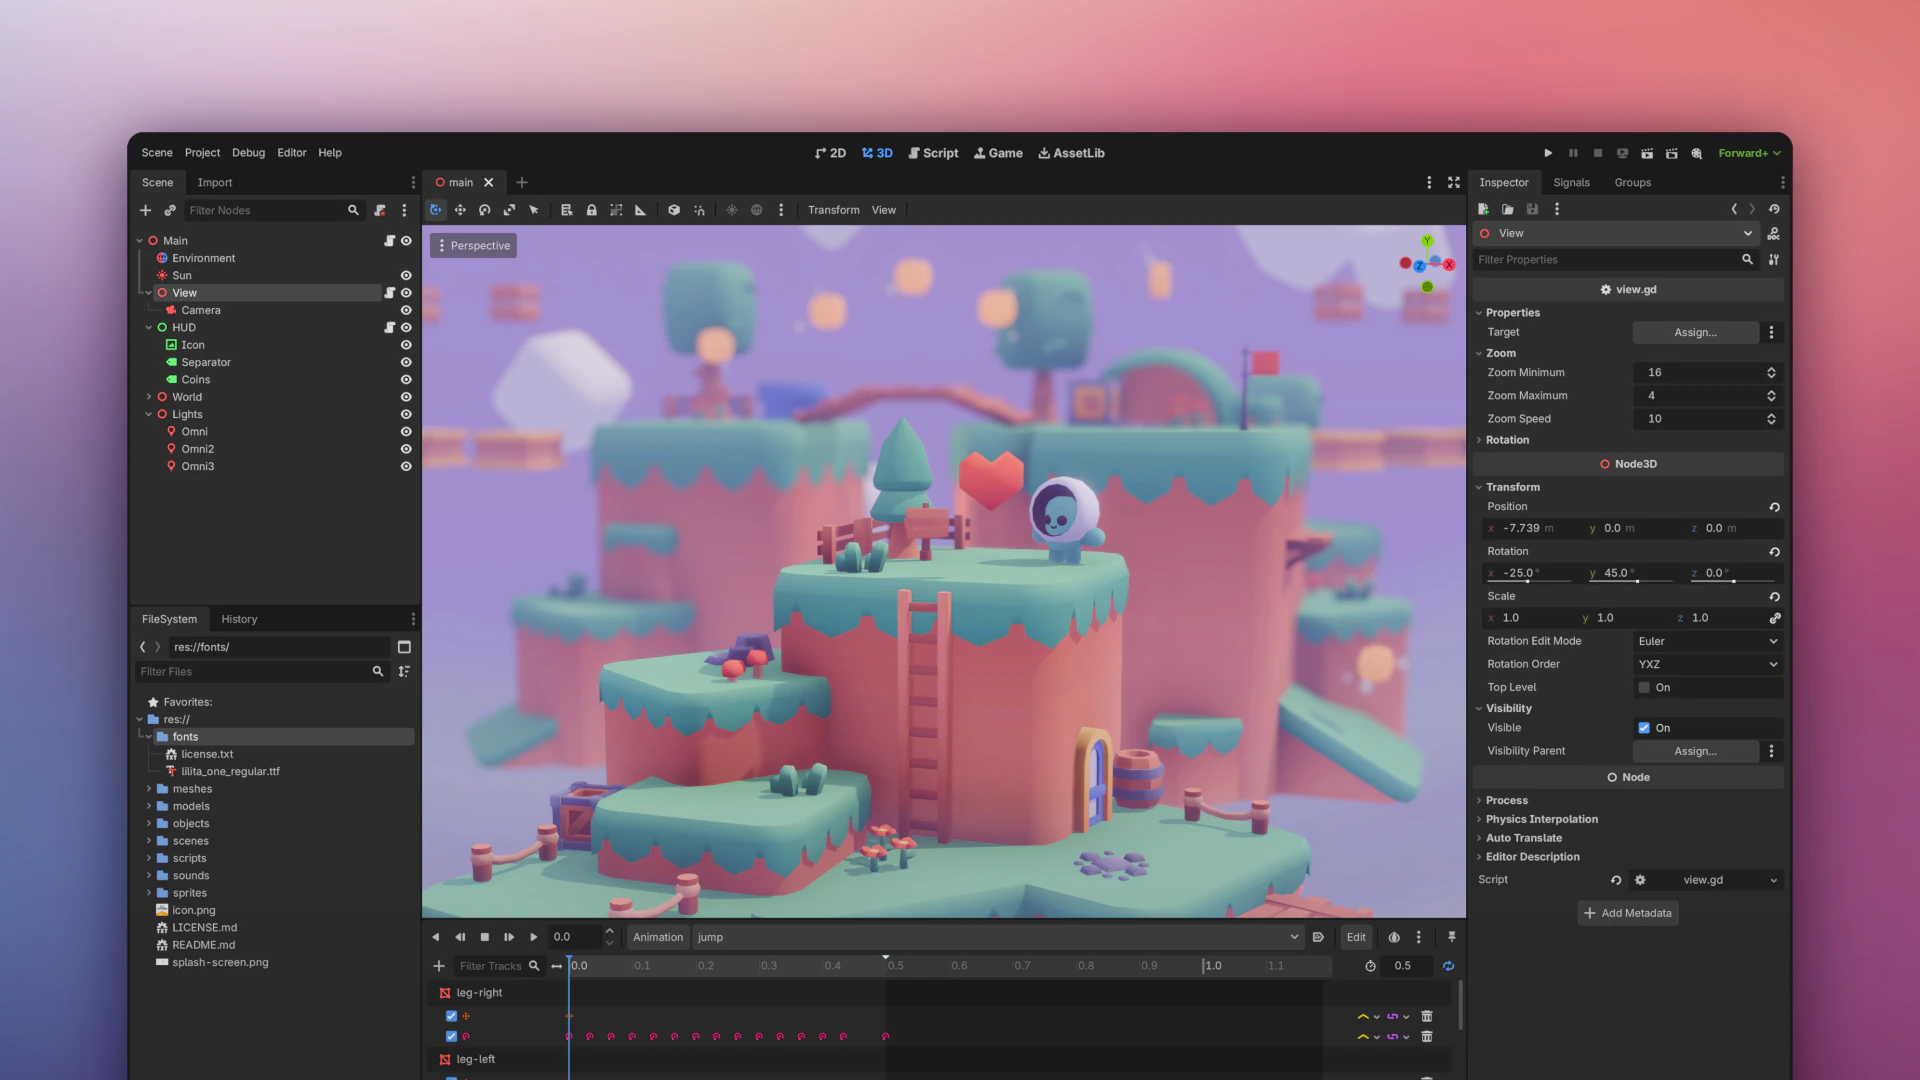
Step 4: Plan Your Folder Structure
Messy folders slow you down as the project grows. Set this up in your template before the jam:
res://
├── scenes/          # .tscn files
│   ├── levels/
│   ├── ui/
│   └── entities/
├── scripts/         # .gd files (mirror scenes/ structure)
├── assets/
│   ├── sprites/
│   ├── audio/
│   └── fonts/
├── addons/          # Installed addons
└── autoloads/       # Global scripts (SceneManager, Util, etc.)
Register your autoloads in Project > Project Settings > Autoload before the jam starts. Scene manager, audio manager, and utility scripts should be ready to go.
Step 5: Test the Full Export Workflow Now
This is the step most people skip. Then they lose the last hour of the jam fighting export bugs. Do it now, before the theme drops.
Export to HTML5 (web)
Web builds get the most plays during voting. Judges can click and play without downloading anything. Here is the full workflow:
- Install export templates. Go to Editor > Manage Export Templates > Download and Install. Do this before the jam. The download takes a few minutes and you do not want to wait during crunch.
- Add a Web export preset. Go to Project > Export > Add > Web.
- Export the project. Click Export All. Name the HTML file
index.html. - Zip correctly. All files must be at the root of the zip. Not inside a subfolder. The zip should contain
index.html,.js,.wasm, and.pckfiles directly. - Upload to itch.io. Create a new project, upload the zip, and check “This file will be played in the browser.”
- Enable SharedArrayBuffer. In your itch.io game page settings, enable the SharedArrayBuffer option. Without this, you will see a Cross Origin Isolation error in some browsers.
- Test in browser. Open the itch.io page and play your game. Test in Chrome and Firefox. Check that audio works and input responds correctly.
Known web export limitations
- GDExtensions (C++) do not work in web builds. Stick to GDScript for web targets.
- Performance varies by browser. Firefox on Linux and Safari on macOS/iOS can have issues. Chrome is the most reliable.
- File size matters. Keep your export under 50 MB. Compress audio to OGG Vorbis, not WAV.
Desktop backup
Always export a desktop build too. If your web build breaks at the last minute, you can upload a downloadable version. Add both Windows and Linux presets in your export settings.
Step 6: Godot Wild Jam #91 Specifics
If you are entering Godot Wild Jam #91 starting March 13, here is what you need to know:
- Duration: 9 days (March 13 to March 22, 2026)
- Theme reveal: At the jam kickoff, 4 PM EST on March 13. The community votes on theme ideas via Discord beforehand.
- Wildcards: Optional bonus challenges announced with the theme. No impact on rating, but a fun creative constraint.
- Team size: Solo or teams up to 5.
- AI policy: AI-generated content is not allowed. All code, art, and audio must be created by humans. Pre-existing assets with proper licenses are fine.
- Rating categories: Theme, Fun, Controls, Graphics, Audio, Accessibility, Originality. Note that accessibility is a rated category. Adding basic options like rebindable controls, colorblind modes, or screen reader support can set your entry apart.
- Submissions close: March 22 at 8 PM EST, with a 1-hour fix window after the deadline.
Quick Reference Checklist
Use this in the days before the jam:
- Download Godot 4.6.1 stable
- Clone and set up a game jam template
- Install and test addons (Phantom Camera, Dialogic, GodotSfxr)
- Set up autoloads (SceneManager, Util)
- Organize folder structure
- Install web and desktop export templates
- Do a full test export to HTML5
- Create an itch.io project page (you can set it to draft)
- Upload a test build and verify it runs in browser
- Join the Godot Wild Jam Discord for theme voting
The theme drops in three days. When it does, you want to spend your time designing and building gameplay. Not configuring menus, fighting export errors, or debugging addon conflicts. Get the boring stuff done now.
For more game jam preparation, check out our survival guide for first-timers and our 24 free tools and asset libraries. If you are comparing engines before committing, we have a full Godot vs Unity vs Unreal comparison. And if you need inspiration for what Godot can produce, browse the best indie games made with Godot in 2025.
Written by
Florian HuetiOS dev by day, indie game dev by night. Trying to give life to GameDō Studio.
Building games and talking about the ones I can't stop playing.